I hope you are enjoying the amazing, fresh, local produce that is available right now at your farmer’s market! Oh man, I love eating this time of year – it’s a burst of new flavour with every week as new foods become available. Don’t you wish you could bottle up summer and save it all year round? Well good news… you can … sort of!
Preserving seasonal foods allows us to experience these fresh flavours year round. This past week, Carly and I decided to preserve some fresh summer produce by making homemade organic blueberry jam. I know the thought of making jam sounds like something only your experienced nonna or grandma could perfect. But don’t fret, this recipe and step-by-step procedure is a task any home cook can handle, as long as you don’t mind a little mess.
Carly and I chose blueberries for a good reason – not just because they are in season, but also because they are easy to clean, no hulling or chopping required… and of course low FODMAP, which means they are easy on your digestive system. You can always apply the principles of canning that we explain in this post to your favourite fruit! Here are a couple important principles behind creating the perfect homemade jam!
The basic ingredients in jam are simple:
Fruit
Sugar
Pectin
Acid
Add heat and you’ve got jam!
What is pectin?
Pectin is a carbohydrate found in plant cell walls. It’s used to make jams and jellies because of its ability to thicken and form a gel. Although pectin is not considered high FODMAP, it has been know to trigger symptoms – particularly gas – so for that reason we avoided adding commercially prepared pectin and used the natural pectin found in lemon peels. Plus, I just love using as many REAL food ingredients as possible – the least from a box, the better is what I say 😉
Fruit naturally contains a high amount of acid, so bacteria can’t grow – which is great for canning! It means you don’t need to use a pressure canner, simply boiling water to create the seal. Low acid foods like meat, poultry and vegetables are much more susceptible to the growth of harmful bacteria, so they need to be sterilized in a pressure canner to keep them safe.
Follow these simple steps to create your own homemade jam! The recipe below makes about 5×125 mL jars of jam, we were ambitious and made close to 50 jars of jam! So don’t be afraid to double the recipe if you want to make a larger batch.
Low FODMAP Recipe: Field Fresh Blueberry Jam
Makes: approximately 5 mason jars (125 mL)
Time: 1 hour prep, 45 minutes cook
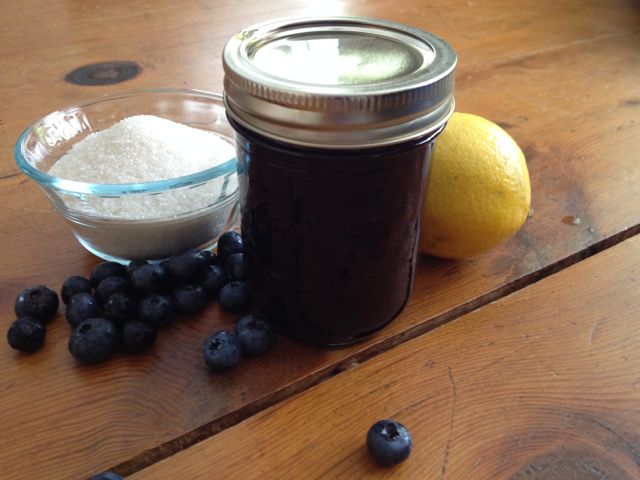
INGREDIENTS
5 cups Blueberries
2 1/2 cup Sugar
1 tbsp lemon juice
Peelings of about ½ a lemon
Helpful Tools/Equipment:
- Secure-grip jar lifter
- Canning funnel
- Magnetic wand
- Oven mitts
- Large stock pot (may want a few)
- Extra large canning pot
- 5 mason jars (125 ml) & lids
- Baking tray
- Ladle
NOTE: Bernardin Home Canning sells all these canning accessories, but they are also available at your local department, grocery, or hardware store – I bought all my equipment from good ol’ Canadian Tire.
INSTRUCTIONS
Get your hands on some local, organic in season fresh fruit!
Note: We sourced organic lemons, cane sugar and blueberries to make 100% organic jam. The blueberries were from Organic Oasis – a small farm store outside of Waterloo that sells delicious farm fresh organic produce, meats, dairy products, baked goods and so much more! ( I love it there – can you tell?)
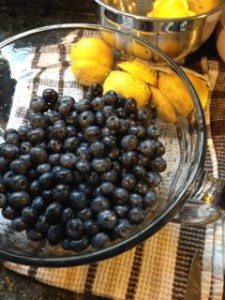
Wash 5 cups of blueberries and sift through to remove stems and rotten berries.
Sterilize your mason jars (not the lids). To do so, fill the extra large canning pot with water. Add the mason jars, ensuring the water is 1-2 inches above the top of the jars. Bring the water to a boil for 2-3 minutes. Remove jars using your secure grip jar lifters to protect your hand and to ensure your jars stay sterilized.
Note: When making jam it is important that your mason jars are kept hot. If you’re using one stovetop, you may run out of room. Consider placing the sterilized mason jars on a baking sheet and to keep them warm in the oven at about 180 °F while you prepare the jam.
The jars lids do not need to be boiled like the jars, but they do need to be kept in hot water. Separate the two parts of the lids- mouth lids from the bands. Put the mouth lids in a small stockpot and keep the water warm by putting on a small burner on a low heat.
Now that jars and lids are ready to go, you can get started on the jam. Add the clean berries to a large stockpot and mash with a potato masher one to two cups at a time. The goal is to release some of the juice, but don’t completely destroy all the structure of the berries.
Add the sugar, lemon juice, and lemon peels to the smashed berries and stir.
Note: Keep the lemon peels large so that they are easy to remove after boiling and don’t forget how many you put in!
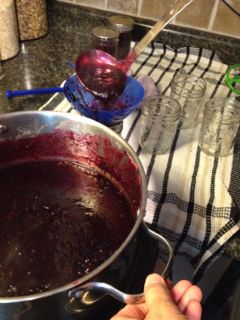
Place the pot on medium-high heat and let the mixture come to a boil. Once it comes to a boil – the jam will want to boil over. So reduce heat immediately and possible take off the burner to make sure it doesn’t explode! Once you have the heat reduced, keep the jam simmering on about medium heat, stirring occasionally.
Once the jam has reached a boil, turn down the heat to medium-low and let it simmer for 20 minutes. After 20 minutes, turn the heat off and remove your lemon peels.
Note: A great way to be sure your jam has thickened enough is the freezer test! Use a spoon to drop jam on a plate and place in the freezer for 2 minutes. Allowing the jam to cool will show you the consistency it will be once you let your jars cool. If you are happy with the thickness, your jam is ready to be canned.
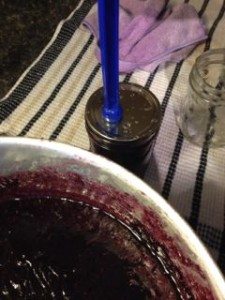
Remove the hot jars from the oven and place them on a clean dishtowel near your pot of jam to reduce the mess. Place the canning funnel in the mouth of a jar.
Using a ladle to spoon the hot jam into your jar. Fill the jars leaving at least a ¼ inch of empty space at the top of each jar.
Once the jars are filled, use a clean, wet cloth to wipe the rims of the jars to remove any jam.
Use the magnetic wand to transfer the mouth lids from the warm water to the top of the jam filled jars. Then lightly screw on the bands.
Note: Be sure not to tightly screw the lid bands on, but ensure they are tight enough that the lid won’t fall off.
Use your secure-grip jar lifters to place the filled jars into the canning pot. You can reuse the water used to boil the jars in the first place. Keep the jars upright and make sure the water is 1 to 2 inches over the tops of the jars. Turn the heat on high and bring to a boil. Once the water is boiling, reduce heat an simmer for 15 minutes.
Note: It’s very important to keep the jars always hot during this process. If you need to work in batches, keep the filled jars in the oven until they are ready to be boiled..
Using the secure-grip jar lifters remove the jars from the boiling water (keeping them up right) and place on a towel/cooling rack. Allow them to cool upright for 24 hours.
After the jars have cooled, check that they are sealed. The lid should be curved inwards towards the jam. Remove the lid bands and wipe any jam around the jars mouth that could prevent a tight seal. After this you can tightly screw the lids bands on.
Store jam in a cool place like a cold cellar for up to two years.
The first step if you’re looking to improve irritable bowel syndrome (IBS) or another digestive disorder or disease, is to understand more about the Low FODMAP diet and if it can help. Download my free eBook to help you better understand this diet and get started implementing simple steps to get rid of symptoms like gas, bloating, pain, diarrhea or constipation related to IBS. Click here to get a copy emailed to you right away.

Much love and good eating,
Stephanie and The Team